I was recently asked about the different triggers in Azure Pipelines YAML. While most of this information can be found in the official documentation, here you can find the info in a bit of a condensed format.
Let's take a closer look at what is offered and how to use them.
Table of Contents:
Where is your code?
The first question you need to answer is where will your code be stored? The trigger system functionality for Azure Pipelines depends on your selected repository provider.
The three major supported Git-repos for Azure DevOps are Azure Repos, Github and BitBucket Cloud. The syntax for all of these is pretty similar, but the major difference between Azure Repos compared to the others is that PR triggers are handled by Branch Policy settings, and not supported in the code of your pipeline at all.
While this post only focuses on the Git-based repositories, there are functionalities like Gated check-in that is supported only for TFVC repositories for obvious reasons.
Different types of triggers
I'm an advocate of building your pipelines using the template structure. Thus, as a rule of thumb you should always be placing your trigger logic in the "main" YAML file you create your pipeline against in the Azure DevOps portal and leave these out of your template files.
Due to the way variables are evaluated in a pipeline, these triggers cannot use them for anything.
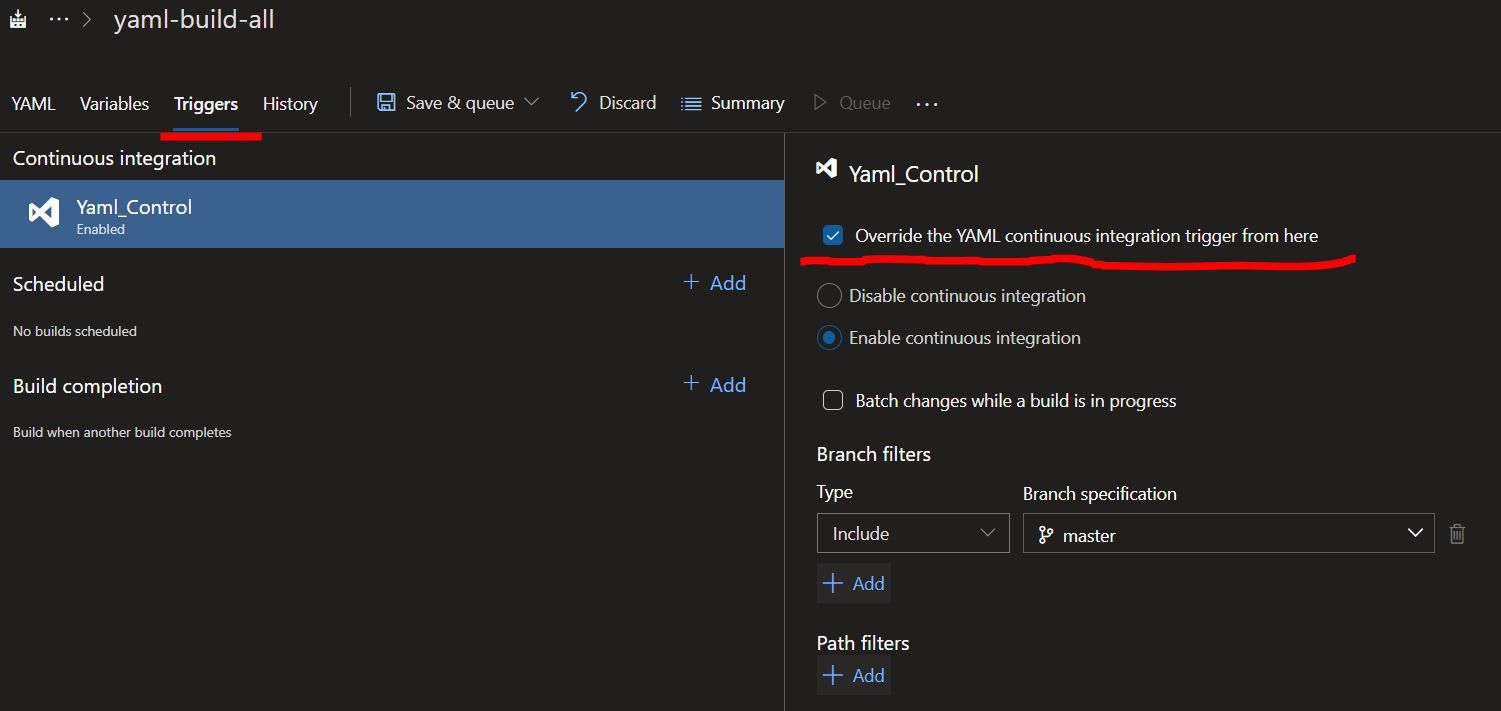
All of the triggers mentioned below can also be overridden in the portal to use the old GUI based logic for setting them up, though I would not advise using this, as it's better to have all of the possible pipeline logic visible in the YAML file.
So what kind of triggers do we have available to use?
Note that these often have a full syntax and a short one, and you often do not need to specify everything that's listed.
CI trigger
trigger:
  branches:
    include:
    - master
    - rel/*
    exclude:
    - rel/old*
    - feature/*-wip
  paths:
    include:
    - '*' # same as '/' for the repository root
    exclude:
    - 'pipelines/*' # same as 'pipelines/'

  # Other options
  # batch: true
  # tags ## same syntax as branches

# Short syntax:
trigger:
- master
- rel/*
This is the most basic and often used trigger. As the name tells you, its purpose is to trigger when new code is pushed to the repo and get your code all built and packaged ready for release.
If you do not specify a trigger in your pipeline, it is run on each push on all branches. Also if you want to disable your triggers completely, you can add a `trigger: none` row in the file.
You can batch runs with `batch: true`. What this means in practice is that if you have a pipeline run 1 ongoing, and two more pushes are done to the repository, those will result in just a single build for the changes combined. This is false by default, so you will get a new build for each push.
You can opt to skip CI triggers for your push if you include "[skip ci]" text in your commit message or description. There are also some other options for the text it detects.
PR trigger
pr:
  branches:
    include:
    - master
    - rel/*
  paths:
    include:
    - *
    exclude:
    - README.md

# Short syntax:
pr:
- master
- rel/*
The PR trigger is meant to run whenever a PR is created and thus make the pipeline act as a validation step to give you further information as to whether your code works.
As mentioned above, these are not supported for Azure Repos at all, but the other Git-based repos do share the syntax shown above.
On pull request creation both Github and BitButcket create new refs pointing to a merge commit. This is the state of the repository where your build will be run. This means that if you made changes to the pipeline you are running as part of the PR, the logic for the check is also fetched from that ref.
Like with CI triggers, if you don't specify anything here, PR triggers are enabled for all branches automatically.
Scheduled trigger
schedules:
- cron: string # cron syntax defining a schedule
  displayName: string # friendly name given to a specific schedule
  branches:
    include: [ string ] # which branches the schedule applies to
    exclude: [ string ] # which branches to exclude from the schedule
  always: boolean # whether to always run the pipeline or only if there have been source code changes since the last successful scheduled run. The default is false.

# Each schedule would be specified separately with a new - cron object.
Sometimes you need to run some long-running builds or repeated tasks on a schedule. Examples of this would be active automated penetration tests or database exports/imports from prod to earlier environments. This is where the scheduled triggers come in.
The syntax is pretty similar to the other triggers here, but each trigger is specified with its own `- cron: *` entry. Each of them can of course then have their branches they trigger on, and all the settings are separate.
In contrast to CI & PR triggers though, there are no default schedules on which a build will be triggered, and you need to explicitly have an include-branch specified for this to work. Just specifying excludes does nothing, but you could do `includes: *` first.
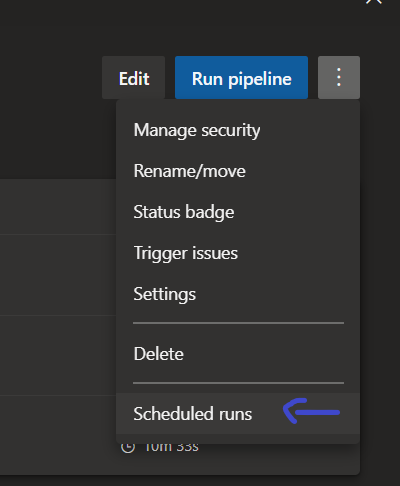
You can view your upcoming scheduled runs in the portal for a specific pipeline:
Comment trigger
Specific to GitHub, collaborators in a repository can use the Azure Pipelines GitHub App to trigger pipelines through pull request comments. You could use these to manually run some larger test suites against the PR if there is no other way to automate the logic in deciding whether or not the specific pipeline needs to run.
In practice, the most used commands you see are:
# Either /AzurePipelines or /azp will work here

/AzurePipelines run  ## Runs all pipelines
/azp run <pipeline name> ## Runs just one pipeline
Triggers in releases
All of the triggers mentioned above are mainly used for CI pipelines instead of CD pipelines. You could of course just schedule a nightly release, but you probably don't want to use a CI-trigger for your release process. The reason being that it's not important whether the contents of your repo have changed, but that you have a new version of your binaries built by a process.
To enable this, Azure Pipelines have the concept of Pipelines as Resources. There are also a couple of others in the case your build pipelines are in some external system.
Pipelines as Resources
resources:
  pipelines:
  - pipeline: build_all # Identifier for the resource in this pipeline context
    connection: mySP  # service connection for pipelines from other Azure DevOps organizations
    project: myProject # project for the source; optional for current project
    source: yaml-build-all #Rename this to match your build pipeline name
    version: string  # the pipeline run number to pick the artifact, defaults to Latest pipeline successful across all stages
    branch: string  # branch to pick the artifact, optional; defaults to all branches
    trigger: # only branches allowed here
      branches:
      - rel/*
      - master
In practice, this will trigger whenever a build completes on the "yaml-build-all" pipeline, or whatever you set the source to be. So whenever a build is ready, our CD logic will push it to the environments. Remember to set `trigger: none` here too.
If you are using deployment jobs in your pipelines, the packages from your pipeline resources are downloaded automatically. The problem is that as the resources field cannot use variables or if conditions, like other triggers, the branch-setting is kind of useless in my opinion and you end up getting the most recent packages regardless of which branch built them.
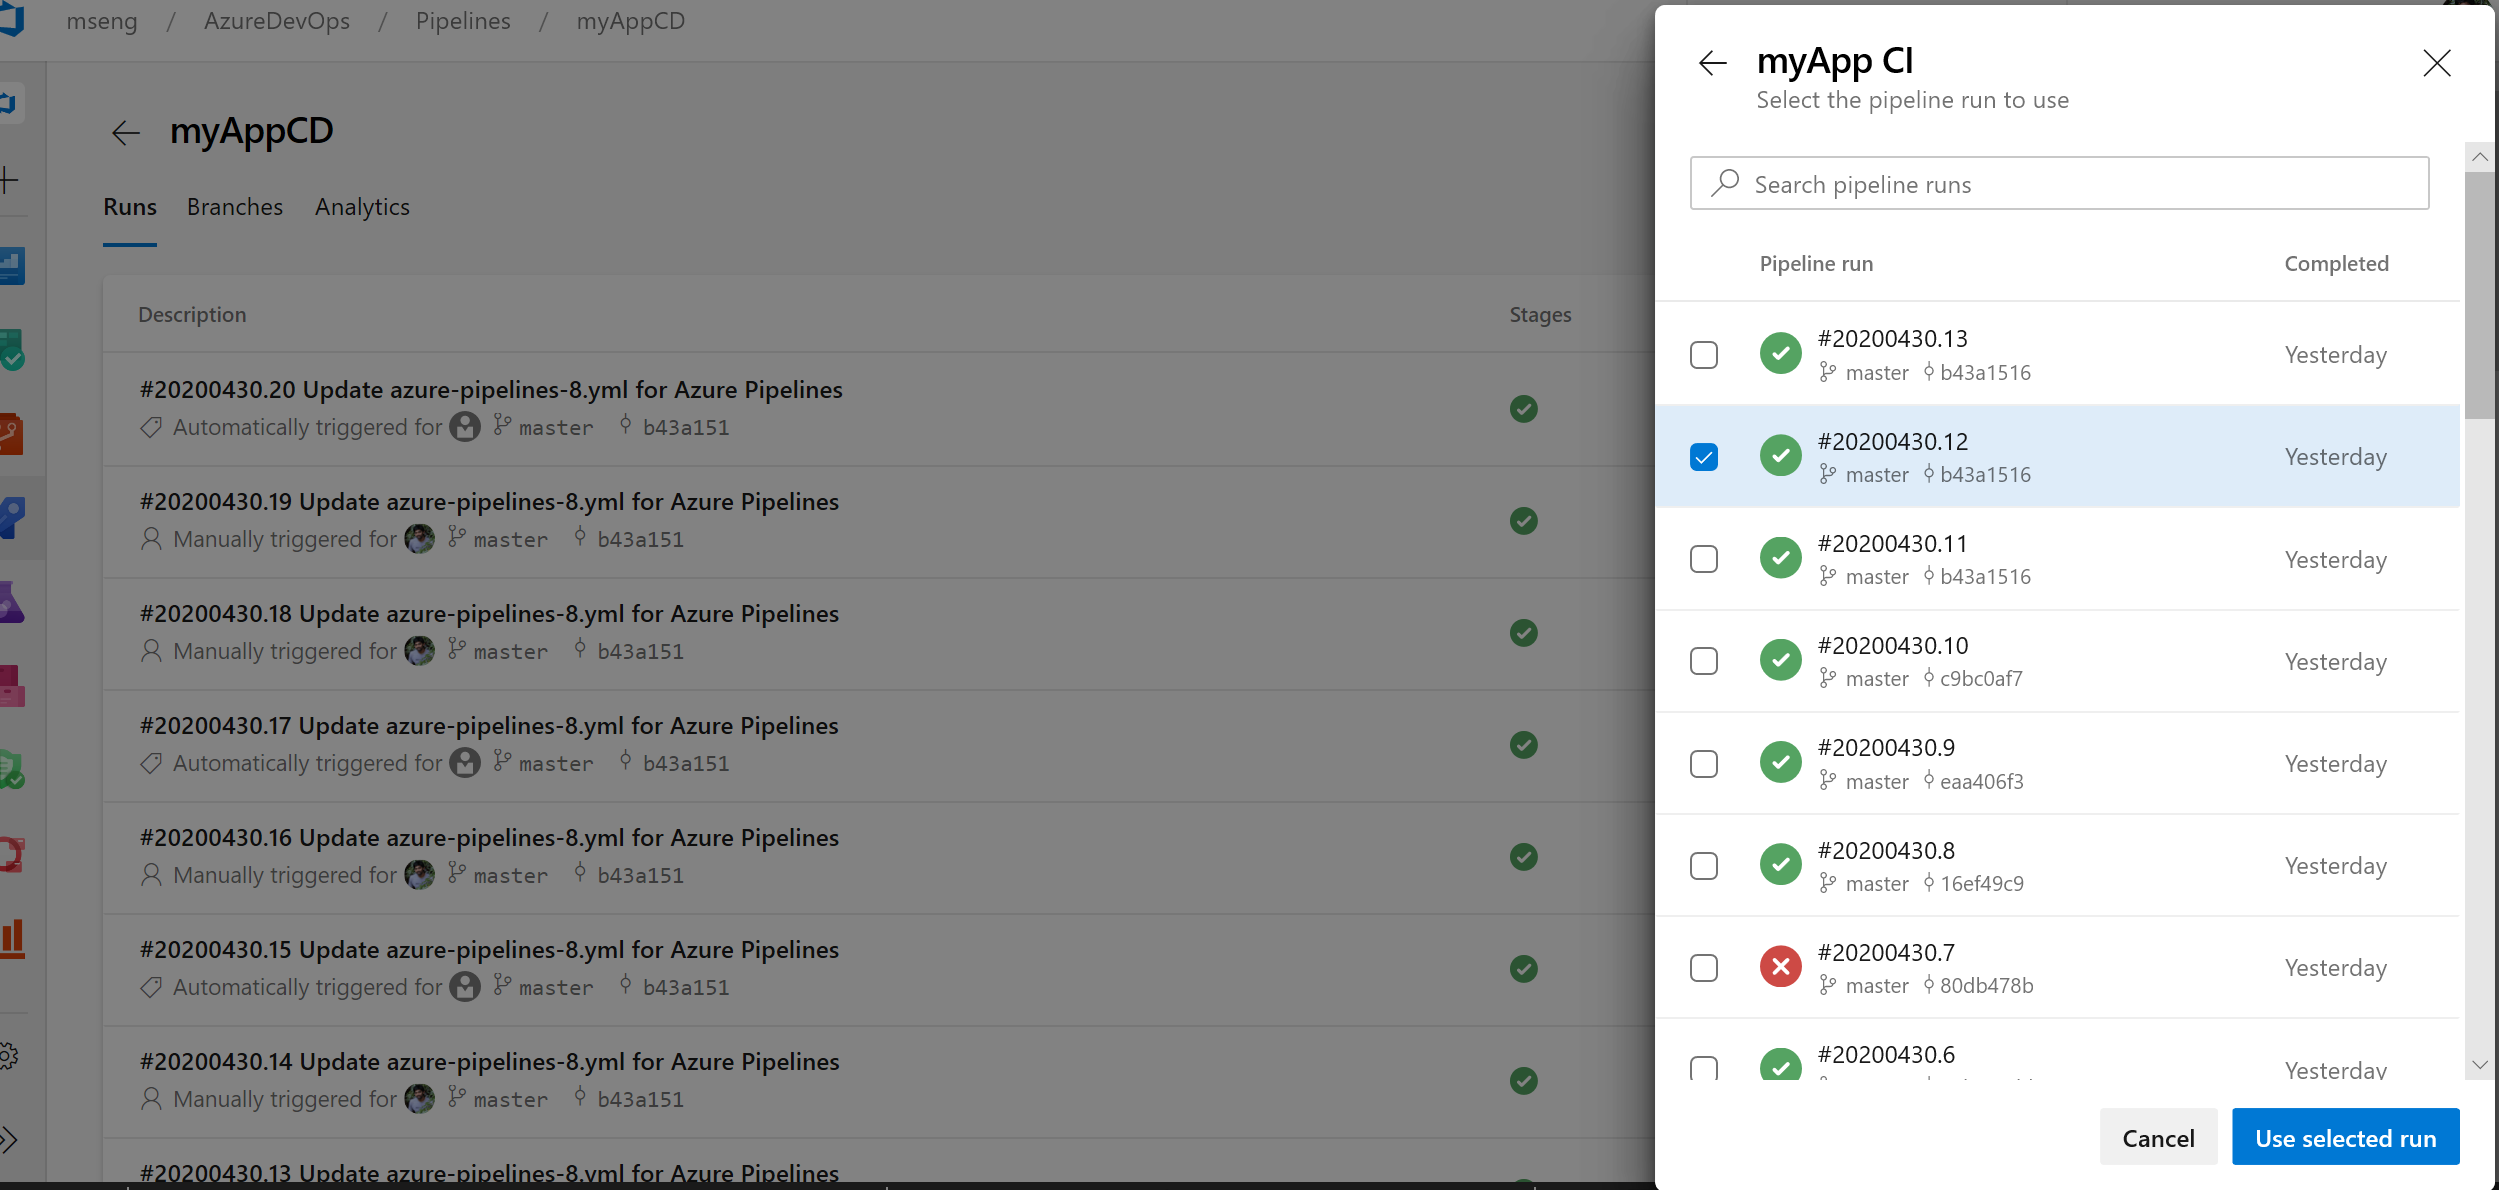
For selecting a specific build to release, you can use the resources-view during runtime and see the pipeline runs to select from. This is still quite new, and at the time of writing I have not yet gotten this feature to work in my organization, so I'm just using my homebrew way to do the same thing and handle the downloads for deployment jobs too.

Troubleshooting
A couple of issues I've run into that turned out to be quite hidden in the documentation.
Resource triggers not working when developing
If you've ever started developing a new CD pipeline in a branch other than the default branch of your repository, you might have noticed that the triggers don't work. The default branch is often master, and the triggers are evaluated based on the pipeline file found in that branch. As the pipeline that you're developing is not yet present in master, the triggers also cannot be evaluated.
To fix this, you need to change the default branch settings to match your development branch until it is merged into master, at which point you should change it back. This can only be done through the UI. See for the steps here.
Scheduled triggers not running after a while
We noticed that during summer vacations, the scheduled triggers did not run as expected. The problem seemed to go away as soon as someone looked at it, without any changes being made. This was a mystery for a long time, but one day I found in the documentation that Azure DevOps goes to sleep five minutes after the last user logs out.
On paper, this seems crazy, but in practice, this has not been a problem during other times from vacation seasons. After the login, your scheduled pipelines will still run once, but CI triggers from GitHub/BitBucket will stop working.
I suppose if it was a common issue and you wanted to work around this, you could create some kind of automation for a dummy user to log into the service every night.
References
This is the best place to start: