I've been doing some work on visualizing Log Analytics data in the last year. When deciding on a Azure native way of doing that, I see people often default to Azure Dashboards, but frankly I feel they provide only very limited capabilities on a very user unfriendly interface.
I decided to implement my requirements with Azure Workbooks instead, as they can produce pretty nifty looking output as long as you know what you would want to see. (Often the most difficult thing to decide). The editing experience isn't that bad either!
Here are some of my tips for beginners and intermediate users thinking of getting started with Azure Workbooks.
Start with a ready-made template
The editing experience and functionality has a bit of a learning curve. On top of learning KQL, you will need to find your way around a bunch of Azure Portal-like menus to configure everything.
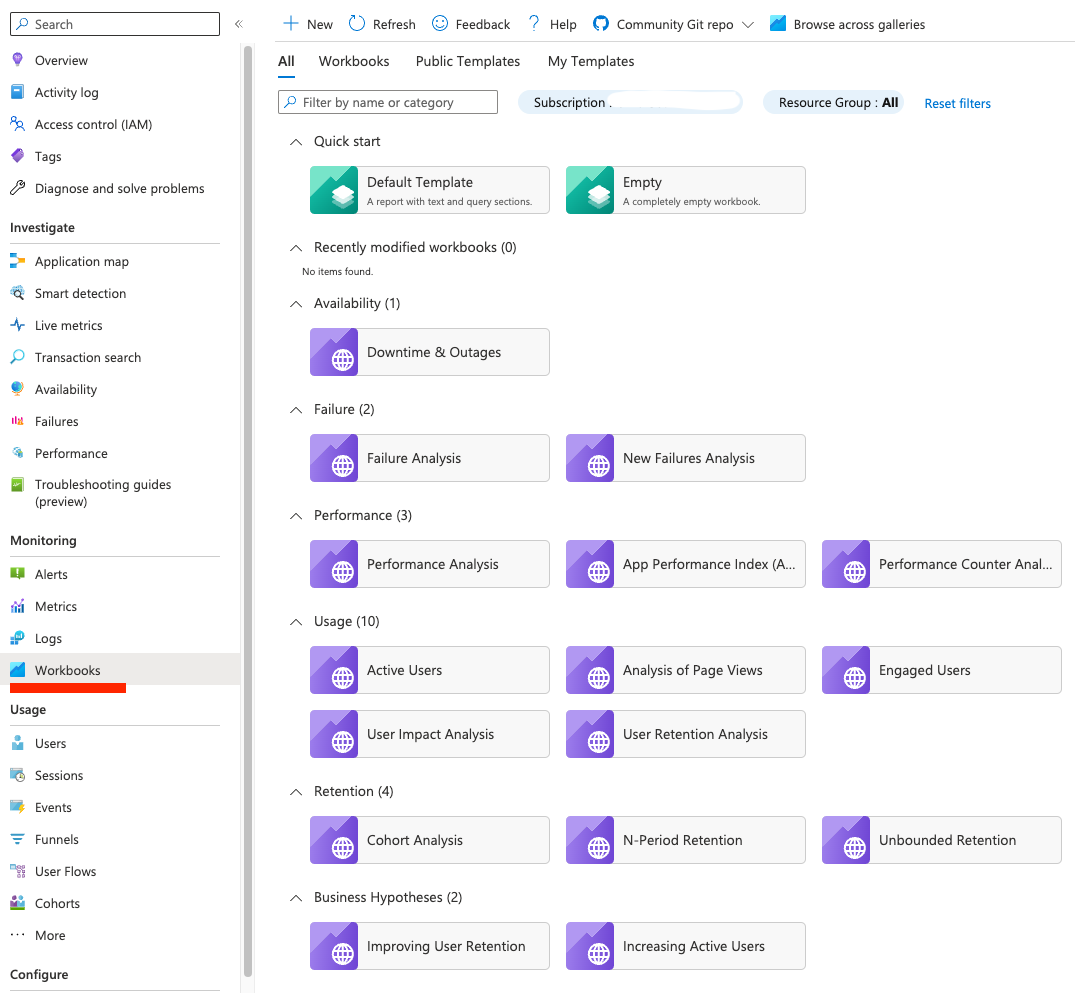
Thankfully Microsoft provides a bunch of examples that are already deployed as part of your Application Insights instance. There are also a few repositories in GitHub with use-case specific workbooks you can use.
Here are a few repos:
 microsoftazure-ad-b2c
Here's how you use them:
- Open up a workbook from your App Insights Workbooks-tab
- Click edit in the top bar -> Save as, and save it with your desired name.
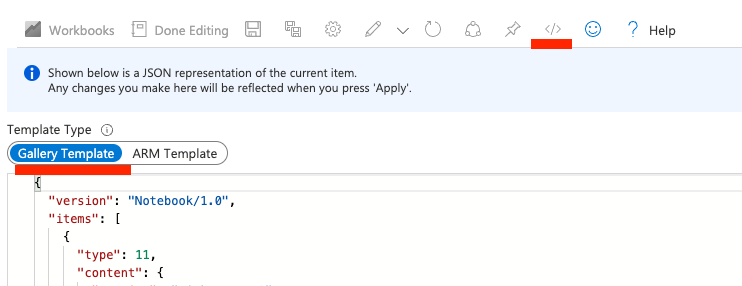
- Go back to the editing experience of your new workbook. If you're happy with the template you selected, continue editing there. If you took code from GitHub, you can go to the "Advanced Editor" button to paste it in. Be sure to be in the "Gallery Template" page. This is also where you can export your code to a repo for example.
Dividing information in pages
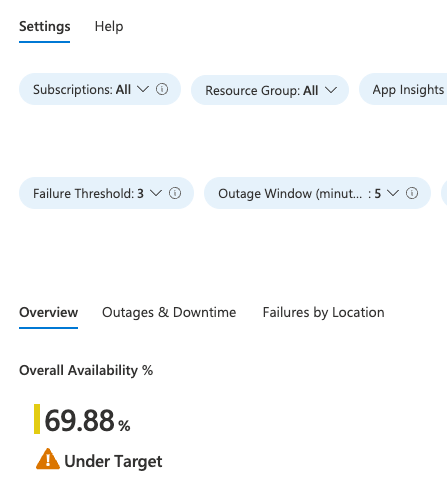
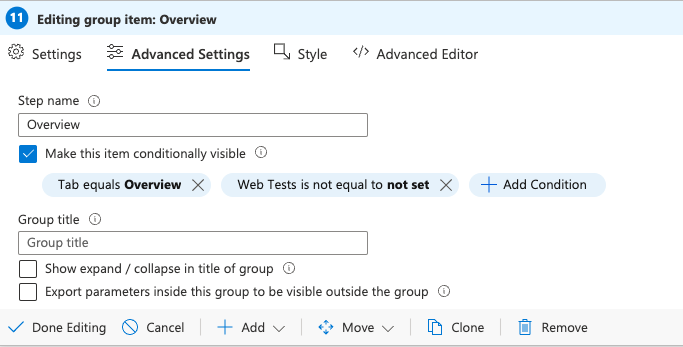
The biggest problem I face when creating dashboards is how to show enough, but not too much information. For helping with this, Workbooks provide a nifty way of paginating the information with a toggle parameter.
Here's an example from the Downtimes & Outages built-in workbook:
The implementation is pretty simple
- Decide a parameter. This can be hidden, or not defined in the workbook directly at all. The example shows this as "Tab", but can be anything.
- Define a links-block, configure the links to use the "set parameter value" function
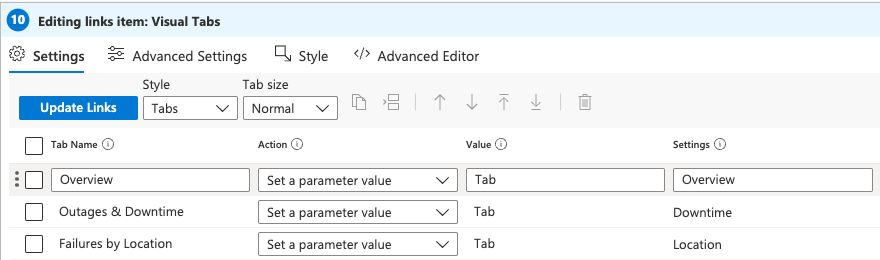
- In your KQL code or built in block config, create logic to show / not show certain information based on the value
A code example can be seen in the JSON chapter below.
Passing values down
Parameter values can change when you're travelling down the workbook, but the changes only affect content below the changing point. Just like with the links we used with creation our pages, we can change parameter values from specific tables resulting from KQL queries. Let's see how to do that next.
My use case is the following: I have a KQL query that returns rows of data, different API operation performances in this case. I want to select a row, and have all my content further down show details for just that API operation.
- First, in the KQL query Advanced Settings, set "When items are selected, export parameters". In the image I've set this to export all the fields to the "Operation" parameter
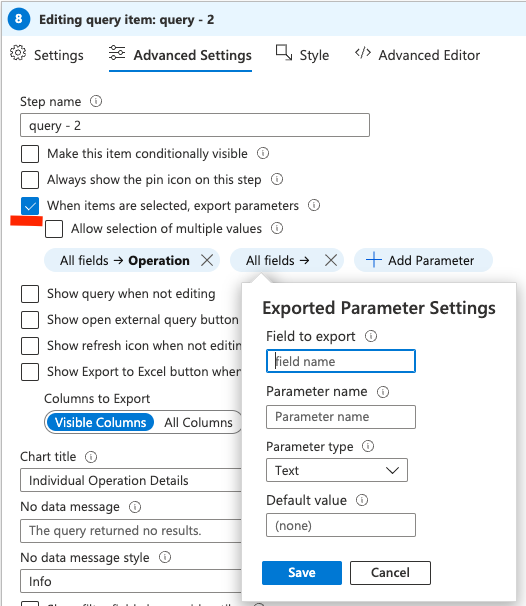
- Next in your content below, take in the exported row and extract the parts you need. Here I'm just taking out the operation name.
let row = dynamic({Operation});
let operation = tostring(row.Operation);
- (Optional) Lastly, if you need to have a markdown field representing the name of the operation for example, I found that doing the parsing of the correct values from the row in a hidden parameter worked well. I just show the SelectedOperation text in the markdown.
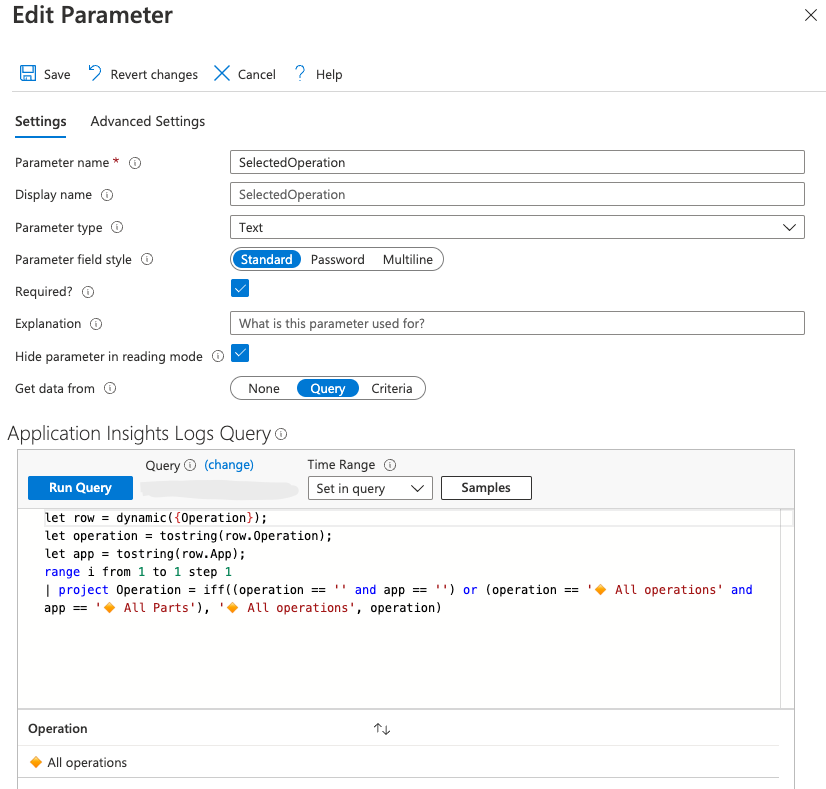
Now when you clic one of the rows in your query, the content below should update accordingly.
Using colors in tables
Color is especially important when you want to quickly see if everything is OK. That's why you should definitely incorporate it into your most important metrics in the dashboard.
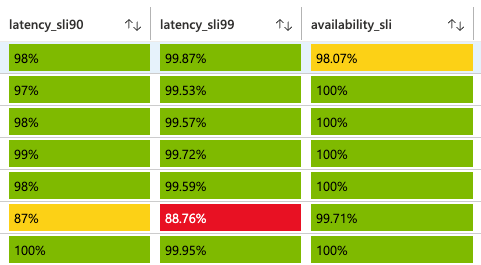
My use case is monitoring Service Level Objectives (SLOs) from Service Level Indicators (SLIs). In this case I have latency and availability SLIs calculated from my data as percentage values. I need to show green if everything is good, yellow if we're missing the mark and red if we're looking real bad. Here's how to do the visualization part of that flow:
- First, open up the "Column settings" in your query.

- Then select your desired column from the list and configure the "Threshold Settings" to be "Colors". Here you can simply set the default values and operators for your data. I have simply set that under 0.85 we show red, at 0.9 we start showing yellow, and anything above that is green. The text field should work with just {0}.
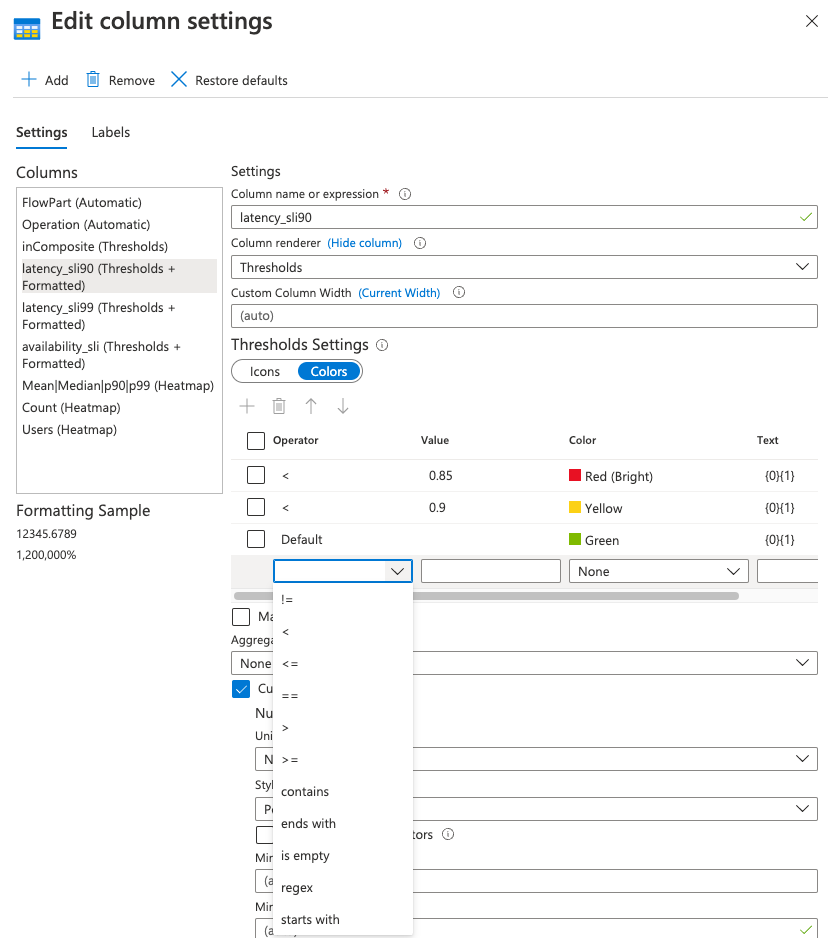
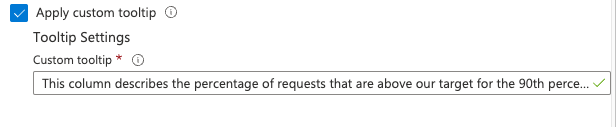
- Here in the same view you can also set custom formatting and custom tooltips. Useful for limiting significant digits in percentages etc.
- Then when you apply, your result should show something like this
Wrap-Up
Hopefully you found these basics helpful!
In the next parts, I'll be looking at slightly more advanced parts like:
- Providing samples and links for specific events
- Storing complex configuration as hidden JSON
- Deployment and editing flow